
Apple has introduced a game-changing feature in iOS Apple Mail: email categorization. This new feature aims to simplify your inbox, making it easier to sift through the flood of messages we receive daily. If you’ve ever felt overwhelmed by promotional emails, social media notifications, or transaction confirmations cluttering your inbox, you’re not alone. Apple recognizes this common frustration and has designed a solution that helps you stay organized with minimal effort.
With this update, Apple Mail automatically sorts incoming emails into four main categories: Primary, Transactions, Updates, and Promotions. The idea is to help users focus on the most urgent and relevant messages while filtering less critical emails into separate sections. Gone are the days of endlessly scrolling or missing an important email because it’s buried under a pile of newsletters and store promotions.
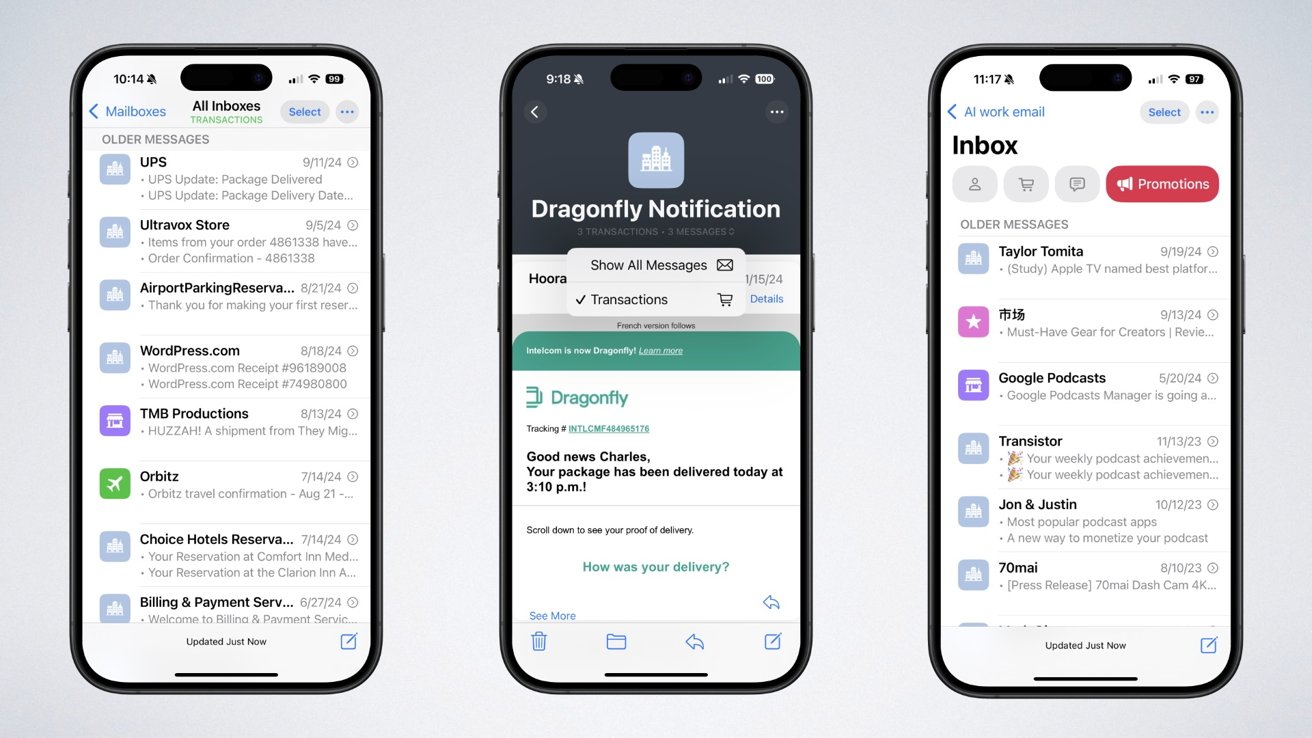
Here’s a quick breakdown of what each category means:
- Primary: This is where your most important messages land. Emails from family, friends, and key contacts are automatically placed here, along with time-sensitive notifications.
- Transactions: Any email related to financial transactions, such as receipts, bank updates, or order confirmations, will be sorted into this category.
- Updates: This section captures email updates from companies or services you’ve subscribed to, as well as social media notifications.
- Promotions: Any bulk or promotional emails from retailers, subscription-based services, or marketing campaigns are categorized here.
For those using an iPhone model that supports Apple Intelligence, categorization is even smarter. The system learns your preferences over time, ensuring that emails are placed exactly where they should be. If you open your inbox and see a message incorrectly categorized, you can manually move it – and Apple Mail will remember your choice for the future.
Another interesting enhancement is that emails in the Primary tab may include short summaries of their content, making it quick and easy to grasp the main point without opening the message. This is incredibly useful when scanning for urgent emails or figuring out which ones require immediate attention.
If you’re someone who prefers skimming through all messages in a single list, this adjustment may feel like a significant change. While it requires a short learning curve, many users find that once they get comfortable with categorized emails, their inbox feels much more manageable.
However, no system is perfect from the start. The categorization feature is designed to adapt over time, improving the more you use it. Initially, you might need to move a few messages to their correct categories and let Mail learn your preferences. But once it does, you’ll likely find yourself spending much less time sorting and more time focusing on what truly matters.
Now that you have a solid understanding of what email categories are and how they work, let’s explore how you can customize them to best fit your workflow. Apple knows that every user has different preferences when it comes to managing their inbox, which is why they’ve included options to fine-tune the categorization feature. Whether you want to enable the feature for the first time, adjust which categories appear, or ensure emails are sorted just the way you like, here’s how to do it.
First, to enable the categories feature, follow these simple steps:
- Open the Mail app on your iPhone.
- Tap the three-dot menu in the top-right corner.
- Select Categories to switch from List View to Categorized View.
- Your emails will now be automatically sorted into Primary, Transactions, Updates, and Promotions.
At first, you may notice that certain emails are being placed in categories that don’t quite make sense. Luckily, you can refine this sorting behavior by manually moving emails to preferred categories. To do this:
- Find the email that is misclassified.
- Swipe left on the email and tap the three-dot button.
- Select Categorize Sender and move it to the right category.
Once you make this adjustment, all future emails from that sender will be placed in the category you selected. This means that with just a few tweaks, your categorization will become more aligned with your expectations over time.
Want to take customizations a step further? Apple Mail allows you to filter specific categories so that only the most relevant ones appear. For example, if you prefer not to see the Promotions category, you can toggle it off. Here’s how:
- Open the Mail app.
- Tap the three-dot menu at the top.
- Select Filter, then uncheck any categories you don’t want to see.
This makes it easy to keep focus on what matters most, reducing the noise of less important emails.
For users with supported iPhones, Apple Intelligence enhances this feature by learning your habits. If you consistently move emails from a specific sender into another category, Mail will eventually adjust on its own. This level of adaptability can save you time in the long run, making email management a seamless experience.
Adjusting your email categories might take a little trial and error, but once you’ve trained Apple Mail to sort your inbox properly, it drastically reduces the effort needed to stay organized. Instead of scrolling through a chaotic inbox, you’ll find important messages front and center while less urgent ones stay neatly tucked away.
Take some time to fine-tune your inbox, and you’ll soon appreciate how much simpler and more efficient your email experience can be.
While Apple’s new email categorization feature is designed to bring organization and efficiency to your inbox, not everyone finds it beneficial. Some users prefer to manually sort their emails or simply don’t like the idea of their messages being divided into separate categories. If you’re among those who prefer a traditional email list without automatic sorting, you’ll be happy to know that disabling this feature is easy and can be done in just a few steps.
To revert to a traditional inbox view, follow these steps:
- Open the Mail app on your iPhone.
- Tap on the three-dot menu in the top-right corner.
- Select List View instead of Categories.
Once you switch to List View, all your emails will appear in a single, continuous list, just like they did before the feature was introduced. This way, you won’t have to navigate between different tabs or worry about emails being filtered into unexpected categories.
If you want to take it a step further and completely turn off categorization settings, you can do so from the iOS settings menu:
- Open the Settings app.
- Scroll down and tap on Mail.
- Find the option for Categories and toggle it off.
Once categories are turned off, Apple Mail will no longer attempt to sort your messages based on sender type or content, and your inbox will remain a unified, chronological list.
Additionally, if you are using an iPhone model that supports Apple Intelligence, you may notice that Mail prioritizes certain emails within the Primary tab or generates short summaries. If you find this more distracting than helpful, you can adjust these features:
- Go to Settings and tap on Mail.
- Select Apple Intelligence & Siri.
- Toggle off Show Priority if you don’t want time-sensitive messages to appear at the top.
For users who want complete control over their inbox without any background sorting or automatic learning, another option is to disable Apple Intelligence entirely. If your iPhone model supports it, you can turn it off by navigating to:
- Settings > Apple Intelligence & Siri > Toggle off Apple Intelligence.
After disabling categorization, you may notice that your inbox feels more familiar, especially if you were used to manually managing your email workflow. Some users find great relief in returning to a straightforward approach where all emails appear in one continuous view, making it easier to scroll through and find what they need at a glance.
Ultimately, Apple’s categorization feature is an optional tool. If it doesn’t align with your email habits, you’re in control and can turn it off at any time. Whether you appreciate smart sorting or prefer keeping things simple, the good news is that Apple Mail gives you choices to customize your email experience the way you like it.
Even with Apple’s best efforts to organize your inbox automatically, you might encounter instances where certain emails are misclassified or categories don’t display as expected. If you’re experiencing issues with the Categories feature in iOS Apple Mail, don’t worry—you’re not alone. The system is designed to learn over time, but sometimes it needs a little help to match your preferences. Here’s how you can troubleshoot common problems and refine email categorization for a more seamless experience.
Fixing Missing Categories
If you’ve enabled Categories but don’t see them in your inbox, try these steps to bring them back:
- Restart the App: Close and reopen the Mail app to refresh the view.
- Check Your View Settings: Tap the three-dot menu in the top-right corner of the Mail app and make sure “Categories” is selected instead of “List View.”
- Ensure Categories are Enabled: Go to Settings > Mail, scroll down to the Categories section, and confirm that the feature is toggled on.
- Check for iOS Updates: Outdated software can sometimes prevent features from working correctly. Go to Settings > General > Software Update to ensure you’re on the latest iOS version.
Correcting Misclassified Emails
If an email appears in the wrong category, you can manually reassign it to a more appropriate section. Apple Mail will learn from this action and improve future sorting. Here’s how:
- Locate the misclassified email in your inbox.
- Swipe left on the email and tap the “More” button (three dots).
- Select Categorize Sender.
- Choose the correct category (Primary, Transactions, Updates, or Promotions).
After doing this a few times for similar emails, Mail should start automatically placing those messages in the correct category.
Fine-Tuning Categories for Accuracy
If you notice that certain senders consistently end up in the wrong category, take proactive steps to adjust categorization:
- Open an email from the sender.
- Tap on the sender’s name at the top.
- Look for the Categorize Sender option and select which category their emails should always appear in.
- Future emails from this sender should now follow your preference.
Disabling Specific Categories
Some users find that not all categories are useful. For example, if you don’t receive many promotional emails and prefer to have them mixed into your inbox, you can disable that specific category:
- Open the Mail app.
- Tap the three-dot menu and select Filter.
- Uncheck any categories you don’t want to use.
This will prevent selected categories from appearing in your inbox, helping you focus only on the emails that matter most.
Resetting Mail Categorization
If the categorization system is still not working as expected, consider resetting the Mail app’s learned behavior:
- Go to Settings > Mail.
- Scroll down and find Reset Categorization.
- Tap it to clear all learned sorting data and start fresh.
- Manually move a few emails to their correct categories so Mail can relearn your preferences.
This can be helpful if you’ve made numerous adjustments that haven’t stuck or if emails are frequently misfiled.
Leveraging Apple Intelligence for Smarter Sorting
For users with iPhones that support Apple Intelligence, categorization becomes even more dynamic. If you allow Apple Intelligence to analyze your email behavior, it will proactively reorganize emails based on patterns it detects. Make sure this feature is activated if you want a more adaptive sorting experience:
- Go to Settings > Mail.
- Tap Apple Intelligence & Siri.
- Enable Improve Categorization if it’s not already turned on.
If you’re still not happy with the way Apple Mail handles categorization, you always have the option to disable the feature entirely and return to a traditional inbox view. But by working through these troubleshooting steps, most users find that the system improves over time, making email management more effortless than ever.